Updated on 10-Dec-2025
Mold on painted walls and ceilings is something almost everyone runs into at some point. It sneaks in after a leak, a humid summer, or sometimes just because the bathroom fan isn’t up to the job. It can be of various colors. Read more gray mold , green mold and blue mold here. You might notice dark spots or a musty smell and wonder what to do next.
This article breaks down how to remove mold from painted walls and ceilings, using things you probably already have at home.
We’ll cover what causes it, how to stay safe while cleaning, and how to keep it from coming back. If required, you can also take help from a professional mold removal near you. Let’s get started so you can get your walls looking (and smelling) fresh again.
Table of Contents
Key Takeaways
- Always find and fix the source of moisture before you start cleaning mold, or it will just come back.
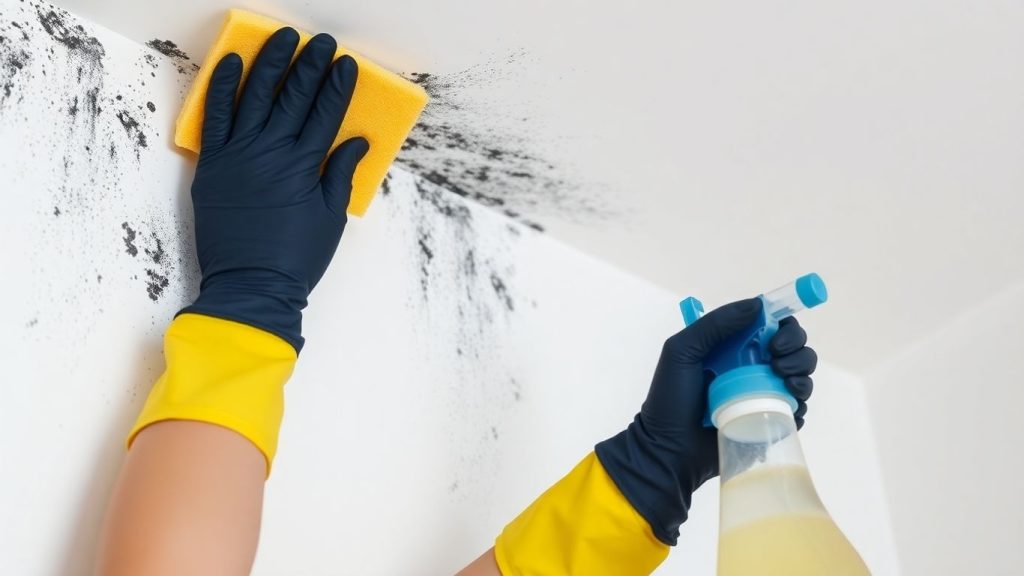
- Wear protective gear like gloves, goggles, and a mask to avoid breathing in mold or getting it on your skin.
- Household items like vinegar, baking soda, or borax can work well for cleaning mold off painted walls and ceilings.
- If the mold covers a large area (more than 10 square feet) or keeps returning, it’s best to call a professional.
- After cleaning, keep humidity low and use mildew-resistant paint to help prevent future mold problems.
Understanding Mold Growth on Painted Walls and Ceilings

Common Causes of Mold in Homes
Mold isn’t picky; it pops up anywhere the environment suits it. Most of the time, it’s all about moisture. If paint is covering a wall or ceiling that’s always slightly damp, especially in bathrooms or basements, you’ve got the perfect stage for mold. Here’s where you commonly set up the right conditions:
- Leaky plumbing hidden behind walls.
- Poor ventilation—think steamy showers with closed doors.
- Flood events or water intrusion after storms.
- Persistent condensation from cold surfaces in humid rooms.
It’s really a mix of water, a surface to grow on, and organic dust or debris that let mold make itself at home on your painted surfaces.
Mold spores are everywhere, but they only become a problem if you let moisture hang around longer than it should.
Why Mold Thrives on Painted Surfaces
Painted areas might seem protected, but they attract mold for a few sneaky reasons. Latex and acrylic paints, especially older or cheaper formulas, can actually absorb a bit of moisture.
If paint is chipped, cracked, or applied on a damp wall, that’s an even easier route for mold. Some paints miss out on ingredients that stop mold, so unless it’s labeled as mildew-resistant, mold can colonize the surface, often blending in until you notice odd streaks or spots.
Don’t forget, even dust or grease sitting on paint feeds mold. Keeping painted walls clean isn’t just about looks—it’s also protection.
Health Risks Associated with Indoor Mold
Mold doesn’t simply look bad; it poses real risks to your health. Spores floating through the air can mess with your breathing.
The side effects kick in faster if you have allergies, asthma, or a weakened immune system. Symptoms range from sniffles and sneezing to headaches and skin rashes.
Here’s a quick look at common health impacts:
| Health Impact | Who’s Most At Risk | Common Symptoms |
|---|---|---|
| Allergic Reactions | Allergy-prone people | Sneezing, runny nose |
| Asthma Aggravation | Asthma patients | Wheezing, coughing |
| Respiratory Issues | Kids, elderly, immune-comp. | Chest tightness, fatigue |
- Never ignore a musty smell—it might mean you’re breathing in tiny particles that aren’t doing your body any favors.
- The longer you delay clean-up, the higher your risk of symptoms or long-term effects.
- For massive patches or ongoing health issues, it’s smart to get a professional involved.
Some folks try to wait out a small mold patch, but even a little spot can trigger symptoms for sensitive people if it’s left alone.
Safety Guidelines Before Removing Mold Yourself
Mold removal sounds pretty straightforward, but it can get risky fast if you aren’t prepared. Protecting yourself during cleanup isn’t just a suggestion—it’s the smart way to keep healthy.
Mold spores are tiny, sneaky, and can cause big problems if you breathe them in or get them on your skin. Here’s what you’ll need to know so you can tackle the job safely or decide if it’s better left to the pros.
Personal Protective Equipment You Need
Before touching mold, put together some gear to reduce direct contact. Don’t skip this step—it’s not overkill, it’s just common sense:
- N95 respirator or equivalent to avoid inhaling spores
- Rubber gloves (elbow length if you can)
- Non-vented goggles or safety glasses
- Long sleeves and pants
- Shoe covers or shoes you can wipe clean easily
A quick look at the gear essentials:
| PPE Item | Purpose |
|---|---|
| N95 Respirator | Filters out airborne spores |
| Rubber Gloves | Protects skin from mold/cleaners |
| Safety Goggles | Keeps spores out of eyes |
| Coveralls/Old Clothes | Shields arms and legs |
Take your time getting set up. Rushing through preparation is one way people end up with stubborn health issues. Safety first, always.
Steps to Limit Exposure During Cleaning
There’s more to staying safe than just gear. Here’s what you need to do:
- Close doors and seal off the area you’re cleaning to keep spores from spreading through the house.
- Open windows and run a fan blowing out, if possible, for air flow.
- Carry a spray bottle with plain water—lightly mist moldy patches before you start scrubbing to lower the number of airborne spores.
- Never eat or drink in the same area as mold.
- As soon as you’re done, shower and change into clean clothes. Bag up everything you wore and wash it separately.
When to Call a Mold Remediation Professional
Sometimes, you just have to wave the white flag and bring in the experts. If any of these sound familiar, pick up the phone:
- The mold covers more than about 10 square feet (a big patch on the wall or ceiling).
- You (or anyone living with you) has breathing issues, asthma, or mold allergies.
- The mold keeps coming back even after you clean it.
- There’s water damage that soaks into walls, ceilings, or floors—hidden mold might be growing behind the surface.
Trying to save money is good, but putting your health or home at risk isn’t worth it. Professional help might cost more upfront, but it pays off in peace of mind and safety.
Preparing the Area for Effective Mold Removal
Getting ready before you actually begin cleaning up mold makes a bigger difference than most people think. If you’re skipping this part, you might end up with spores spreading everywhere, or even risk damaging your stuff.
Here’s what goes into doing it right—trust me, it makes cleaning up so much easier and safer in the long run.
Identifying and Stopping the Source of Moisture
First up, figure out where the water is coming from. Is it a leaking window, steamy bathroom, or that roof drip you keep putting off?
Stopping the moisture is the most important step. If the source isn’t fixed, mold will just keep showing up, no matter how much you scrub.
- Check for any leaks around windows, roofs, or plumbing.
- Look for condensation on pipes and surfaces—especially in bathrooms or basements.
- Don’t ignore water stains; moisture is likely trapped behind those spots.
- If you find rotten wood with mold, replacing it is often necessary.
If you deal with the water but not the mold, that’s only half the problem solved. It won’t stay gone for long.
Ventilating the Space Properly
Mold removal means lots of spores floating in the air, so fresh air is your friend. Proper airflow also dries things faster and makes cleaning less stuffy.
- Open windows in and around the room before you start.
- Use a fan if you’ve got one, aiming it to blow air out an open window—not into the rest of your house.
- Consider turning off your HVAC to keep spores from spreading through ductwork.
- If you need to leave vinegar on mold for a while, ventilating helps with fumes too—spray vinegar directly on mildew and let it do its job, but don’t hang around in a closed-up room.
Protecting Furniture and Floors from Contamination
There’s a good chance mold spores or cleaning solution will get on something you didn’t expect. Protecting your stuff before starting keeps the cleanup from turning into an even bigger job.
- Cover floors, furniture, and electronics with plastic sheeting or old sheets.
- Move as many items out of the room as possible—especially anything fabric.
- Tape plastic along the baseboards to keep liquid and debris from seeping underneath.
- Keep your cleaning supplies in the area to avoid tracking mold to other rooms.
Here’s a quick reference table for the basics:
| Task | Why It Matters |
|---|---|
| Fix leaks before cleaning | Prevents mold from returning |
| Open windows/use fans | Lowers airborne spore levels |
| Remove or cover furniture | Keeps spores and cleaners off items |
| Use floor & wall protection | Easier cleanup and less spread |
Once all these boxes are checked, you’re ready to tackle the real mold removal without making your home situation worse. Take the time now, and cleaning won’t feel like such a hassle later.
How to Remove Mold from Painted Walls Using Household Solutions

Mold on painted walls isn’t something you want to ignore. Apart from looking unpleasant, it can bring an unwanted, musty smell that’s hard to mask.
Luckily, there are several ways you can tackle this problem using items you probably already have in your home.
Let’s break down the safe, budget-friendly methods—and a few things to avoid—so you can get your painted walls back to clean.
Natural Cleaners: Vinegar, Baking Soda, and Borax Methods
If you’re not too keen on harsh chemicals, you’re in luck. There are plenty of natural cleaners that work surprisingly well on mold:
- Vinegar: Pour undiluted white vinegar into a spray bottle. Spray directly onto the moldy area, let it sit for at least 30 minutes, then scrub it with a non-abrasive brush. For stubborn patches, repeat and wipe thoroughly with a damp cloth.
- Baking Soda: Mix half a cup of baking soda with enough water to make a thick paste. Apply the paste to the affected areas, let it sit for 10-15 minutes, then scrub. Rinse and wipe with a clean, damp rag.
- Borax Solution: For a slightly stronger option, mix 1 tablespoon of borax in 1 cup of hot water. Spray or dab onto the mold, scrub lightly, and leave it to dry (borax helps prevent mold from coming back).
Even though these methods are considered safer, always ventilate the space and wear gloves when handling any cleaning product.
Bleach and Commercial Mold Removers: What Works and What to Avoid
Bleach and commercial sprays can kill mold spores, but they aren’t always the best first choice. Bleach can discolor paint and may not remove mold roots beneath the surface. If you do use bleach, mix ⅓ cup of bleach with 1 gallon of water, apply with a sponge or spray bottle, and rinse well.
Here’s a quick comparison for clarity:
| Solution | Pros | Cons |
|---|---|---|
| Vinegar | Non-toxic, easy to find | May need repeat applications |
| Baking Soda | Safe, mild abrasive | Sometimes less effective on stains |
| Borax | Prevents regrowth, affordable | Can be unsafe if ingested |
| Bleach | Kills surface mold fast | Can fade paint, harsh fumes |
| Mold Remover spray | Convenient, fairly strong | Often more expensive, chemical smell |
Avoid mixing vinegar with bleach—this combo releases toxic fumes. Also Read – How To Kill Mold With Hydrogen Peroxide? – Does Activated Charcoal Kill Mold?
Step-by-Step Cleaning Process for Painted Surfaces
It helps to follow a simple routine to make sure you don’t miss any spots or cause unnecessary damage:
- Open a window and put on gloves and a mask.
- Remove loose dust or mold spots with a soft, dry cloth.
- Spray or dab your chosen cleaner onto the moldy patches.
- Let it sit (10–30 minutes or as directed).
- Scrub gently with a soft-bristled brush or non-scratch pad.
- Wipe away residue with a clean, damp rag.
- Allow the wall to dry completely—use a fan if needed.
Being thorough the first time makes it far less likely you’ll see the mold come back.
Remember, painted walls can be finicky—too much water or scrubbing might chip the paint. If you spot a large amount of mold or if the wall feels soft, that’s a sign you should call in a pro instead of trying to fix it yourself.
Targeting Mold on Ceilings Without Damaging Paint

Mold can show up anywhere, even on ceilings that look fine otherwise. People often worry about making things worse by scrubbing too hard or using harsh chemicals. But if you go slow and use the right approach, you don’t have to ruin your painted ceiling to get the job done. Let’s walk through how to deal with ceiling mold while keeping your paint intact.
Safely Treating Mold on Different Ceiling Materials
Before anything else, make sure you know what your ceiling’s made from. Some methods work better on certain surfaces:
- Painted drywall: Avoid soaking it. Use lightly dampened rags instead of scrubbing hard.
- Plaster: A gentle approach works best; try natural mold removers like vinegar.
- Wood panels: Use less liquid and let the area dry quickly.
- Ceiling tiles: Sometimes these are too porous and need replacing if fully soaked.
Test a small spot first so you don’t accidentally lift the paint. For colored walls or ceilings, stick with warm water, a mild soap, and a soft sponge—using a non-abrasive kitchen scourer helps avoid damage, as mentioned in details for colored walls.
Spray Application Techniques for Hard-to-Reach Areas
There are places on the ceiling you can’t reach—even standing on a step-stool. That’s where spray bottles and extendable cleaning wands really shine:
- Fill a spray bottle with your mold cleaner—white vinegar or a borax solution are both safe choices for paint.
- Lightly mist the affected area instead of soaking it.
- Give it about 10-60 minutes to work (depending on your solution).
- If your ceiling is high, an extendable pole with a microfiber cloth can help spread and wipe without pressing too hard.
Never mix cleaning products—especially bleach with ammonia, which creates toxic fumes.
Tips for Rinsing and Drying Ceilings Thoroughly
After cleaning, it’s a big deal to make sure there’s no cleaner or moisture left behind—otherwise, mold just comes back. Here are the steps that work well:
- Wipe gently with a clean, damp cloth to remove any cleaning residue.
- Use fans or open windows for better ventilation and to speed up drying.
- For stubborn spots, repeat the wipe-down but keep moisture minimal each time.
| Ceiling Material | Recommended Cleaner | Drying Method |
|---|---|---|
| Painted Drywall | Vinegar, mild soap | Fan/air dry quickly |
| Plaster | Vinegar, borax | Gentle towel + air |
| Wood | Borax, minimal water | Immediate fan drying |
Cleaning up ceiling mold isn’t fun, but if you go step by step and dry everything as you go, you’ll protect your paint and make sure the mold doesn’t come right back.
Preventing Mold from Returning After Cleaning
Keeping mold gone is about more than just scrubbing walls. You have to change what’s going on in your home so mold doesn’t get comfy again. Let’s go through some real steps you can take so you’re not stuck fighting the same battle twice.
Managing Indoor Humidity and Moisture
- Aim to keep indoor humidity below 60%. If you can, try for 30–50%—mold hates dry air.
- Use a dehumidifier in rooms that get damp, like basements or laundry spaces.
- Always run the exhaust fan (or crack a window) during and after showers or cooking. Kitchens and bathrooms trap moisture fast.
- Fix leaky pipes, drips, or any windows with condensation. This sounds obvious but even small plumbing issues can create the perfect spot for mold to sneak back. So, Dont wait to call a plumber near you.
| Area | Suggested Action |
|---|---|
| Bathroom | Use fan, wipe down surfaces |
| Kitchen | Ventilate when cooking |
| Basement | Run dehumidifier regularly |
| Laundry Room | Fix vent leaks, air it outHow To Remove Mold From Painted Walls And Ceilings |
If you’re noticing windows fog up or your home feels swampy, it’s time to address humidity. Mold loves those sticky conditions and shows up where you’re not looking.
Choosing Mildew-Resistant Paints and Primers
- Pick paints labeled mildew-proof or mold-resistant for high-moisture zones.
- Use a quality primer that stops moisture from seeping into the wall. It costs a little more up front but saves tons of trouble later.
- If you’re painting over a spot where mold once lived, wait until it’s completely dry and fully cleaned—otherwise, you’re just trapping spores under a new coat.
Maintenance Tips to Keep Walls and Ceilings Mold-Free
- Check for leaks and standing water regularly behind furniture or under sinks.
- Don’t shove sofas flush against chilled walls—let air move.
- Open windows on dry days, especially after cleaning up spills or splashes.
- Keep closets and storage areas tidy, so nothing traps moisture against the walls.
- Clean ceilings and upper corners every month with a vinegar spray—it’s simple and keeps spores in check.
By coordinating these habits, you’ll keep mold from making a comeback—and your home’s air will feel fresher overall. It takes a bit of routine effort, but honestly, it’s way easier than fighting mold patches every other month.
Proper Disposal and Cleanup After Mold Removal
After you’ve scrubbed, wiped, and maybe even cursed at the mold spots on your painted walls or ceiling, you’re not done yet—the real work starts with how you clean up and get rid of the waste.
If you just toss contaminated rags and sponges in the kitchen trash, you might notice musty smells returning in a week or two. Mold spores can spread quickly if you don’t handle disposal and cleanup the right way.
Let’s walk through how to leave your space safe and fresh.
Handling Contaminated Materials and Rags
- Place all moldy rags, sponges, and disposable gloves in a heavy-duty trash bag.
- Seal the bag tightly and don’t let it sit around indoors—take it straight outside.
- For larger jobs, double-bagging offers extra protection against leaks or tears.
Bagging and disposing of all contaminated materials right away helps avoid unintended cross-contamination throughout your home.
Cleaning Tools and Protective Wear Safely
- Wash reusable tools (like brushes or goggles) with hot, soapy water or a vinegar solution.
- For brushes, soaking them in a mild bleach mix for an hour can help kill lingering spores.
- Let all gear dry completely before putting them away. Humidity left on tools just invites more mold.
If you’re dealing with any large or heavily affected belongings, using a water and vinegar mixture is a safe bet. In stubborn cases, or if you find the mold coming back, it’s sometimes smart to look into more professional help—like you’ll see in this clean items exposed to mold rundown.
Disposing of Waste to Prevent Cross-Contamination
- Right after finishing, change and wash your cleaning clothes separately from your regular laundry—use hot water.
- If you used a vacuum with a HEPA filter, empty the canister or bag outside, and clean it thoroughly.
- Wipe down any surfaces where bags or moldy items touched with a disinfectant.
| Item | Disposal Method | Extra Step |
|---|---|---|
| Rags/Sponges | Double-bag & trash | Seal; remove immediately |
| Protective Gloves | Bag & trash | Don’t reuse |
| Gowns/Clothing | Wash separately, hot | Dry fully before reuse |
Taking a few extra minutes with your cleanup can keep mold from popping up again—or spreading to other rooms.
Even the smallest misstep, like leaving a trash bag in the hallway, gives spores a new place to grow. Clean fast, clean well, and your walls and ceilings will stay mold-free for the long haul.
Wrapping Up: Mold Removal Made Simple
So, that’s the lowdown on getting rid of mold from your painted walls and ceilings. It can be a bit of a hassle, but with the right tools and a little patience, you can handle most small patches yourself.
Just remember to always figure out where the moisture is coming from first—otherwise, the mold will just keep coming back. Use stuff like vinegar, hydrogen peroxide, or borax for a safer clean, and always wear gloves and a mask.
If the mold covers a big area or keeps returning, it might be time to call in a pro. And once you’ve cleaned up, try to keep things dry and well-ventilated so mold doesn’t get a chance to move back in.
It’s not the most fun weekend project, but it’s definitely worth it for a healthier home.
Frequently Asked Questions
Is it safe to use bleach to clean mold from painted walls and ceilings?
Bleach can kill surface mold and lighten stains, but it doesn’t always reach mold roots, especially on porous surfaces. It can also damage paint and create strong fumes. For many cases, natural cleaners like vinegar or hydrogen peroxide are safer and just as effective.
What should I wear when cleaning mold from my walls or ceiling?
Always wear an N-95 mask, rubber gloves, and safety goggles to protect yourself from breathing in mold spores or getting them in your eyes. Long sleeves and pants can also help protect your skin.
How can I prevent mold from coming back after cleaning?
Keep your home dry by using fans, dehumidifiers, and opening windows to lower humidity. Fix any leaks right away and consider using mildew-resistant paints in problem areas like bathrooms or kitchens.
Can I paint over mold if I can’t remove it all?
No, painting over mold will not solve the problem. The mold will grow through the new paint and could make the problem worse. Always clean and remove all visible mold before painting.
When should I call a professional instead of cleaning mold myself?
If mold covers more than 10 square feet, keeps coming back, or if anyone in your home has allergies or breathing problems, it’s best to call a mold remediation professional. They have special tools and training to handle big or tough jobs safely.
What is the best natural cleaner for removing mold from painted walls?
White vinegar is a great natural choice. Spray undiluted vinegar on the moldy area, let it sit for at least an hour, then wipe and rinse. Baking soda and borax also work well, especially for painted surfaces.
