
Updated on 13-Jul-2026
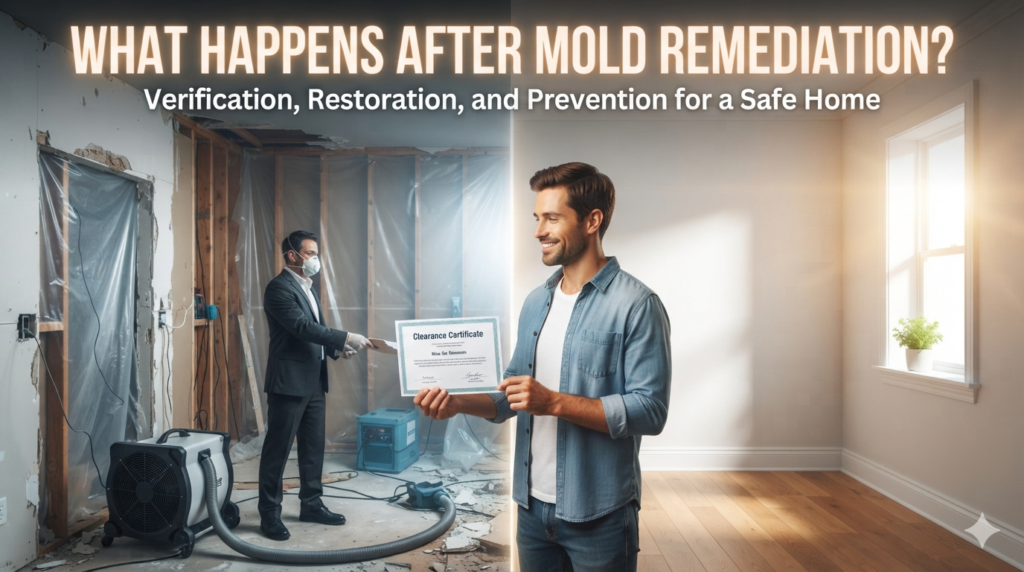
The mold is removed. The containment is coming down. The equipment is being packed up.
Now what?
For many homeowners, this is the confusing part of the project. The active remediation work may be finished, but the home may not be fully back to normal yet.
Drywall may still need to be replaced.
Insulation may be missing.
Flooring may be open.
A dehumidifier or air scrubber may still be running.
You may have photos, invoices, moisture readings or clearance results to review.
You may also be wondering how to know whether the mold is really gone.
The right aftercare matters.
A good mold remediation project does not end with visible mold removal. It should leave the affected area clean, dry, documented and ready for safe repair. It should also give you a clear understanding of what caused the mold and what must be fixed so it does not return.
Table of Contents
Key Takeaways
- After mold remediation, the affected area should be visibly clean, dry and free of loose debris.
- The moisture source must be corrected before rebuilding begins.
- Drywall, insulation, flooring or trim should not be replaced over damp materials.
- Post-remediation verification or clearance testing may be recommended for larger, sensitive or documented projects.
- Rebuilding is usually a separate phase from remediation.
- A musty smell after remediation should not be ignored.
- Humidity, leaks and condensation should be monitored after the work is complete.
- Photos, reports, invoices and moisture readings should be saved for insurance, real estate or future reference.
- Mold can return if the original water or humidity problem continues.
Summary Checklist
-
Day 1-3: Remediation company completes work; air is scrubbed; containment is removed.
-
Day 4-5: Post-remediation verification (PRV) occurs; clearance report is issued.
-
Week 1-2: Restoration (rebuilding walls, painting) begins.
-
Week 3+: HVAC cleaning and final deep clean of the home.
-
Ongoing: Monitoring humidity and preventing future water intrusion.
What “Finished” Should Mean After Mold Remediation
Finished should mean more than “the visible mold is gone.”
A completed remediation area should generally meet these expectations:
- The agreed contaminated materials have been removed or cleaned.
- The work area has been HEPA vacuumed and cleaned where required.
- There is no visible mold growth in the remediated area.
- Remaining building materials are dry enough for the next phase.
- The moisture source has been corrected or clearly identified for repair.
- The contractor has explained what was removed and what still needs repair.
- Containment has been removed only after cleaning is complete.
- The area is ready for reconstruction, drying, monitoring or clearance testing depending on the scope.
Some projects are complete after cleaning and final inspection.
Others move into a drying, clearance or reconstruction phase.
That difference should be explained before the crew leaves.
Step 1: Final Walkthrough
A final walkthrough is the first thing homeowners should expect after remediation.
This is not a casual look around the room.
The walkthrough should confirm:
- Which areas were remediated
- Which materials were removed
- Which surfaces were cleaned
- Whether any new damage was found
- Whether the source of moisture has been corrected
- Whether the area is dry
- Whether reconstruction can begin
- Whether any follow-up work is needed
If the project involved hidden mold behind drywall, under flooring or inside a ceiling, the exposed area may look unfinished. That is normal.
Remediation often opens the building assembly so contaminated materials can be removed and structural components can dry.
Do not judge the project only by whether the room looks “pretty” at the end. Judge it by whether the affected materials are clean, dry and ready for the next step.
Step 2: Moisture Confirmation
Moisture is the reason mold grew in the first place.
That is why drying confirmation matters after remediation.
Depending on the project, the contractor may check:
- Wood framing
- Subflooring
- Concrete
- Drywall edges
- Ceiling cavities
- Wall cavities
- Attic sheathing
- Insulation areas
- Basement wall materials
Moisture meters, hygrometers and visual inspection may be used to confirm whether the area is ready for rebuilding.
A surface can look dry while moisture remains inside a cavity.
This is especially common after:
- Plumbing leaks
- Roof leaks
- Basement seepage
- Appliance leaks
- Bathroom leaks
- Window leaks
- Flooding
- Wet insulation
Rebuilding too soon can trap moisture and create another mold problem behind new materials.
EPA guidance is simple on this point: water problems should be fixed and items dried completely. Porous materials that cannot be cleaned and dried may need to be discarded.
Step 3: Confirm the Moisture Source Is Fixed
Mold remediation removes contamination. It does not automatically repair every cause of moisture.
Before rebuilding, confirm what caused the mold.
Common sources include:
- Roof leaks
- Plumbing leaks
- Foundation seepage
- Window leaks
- Condensation
- Poor bathroom ventilation
- High indoor humidity
- Ice dams
- Leaking appliances
- Wet insulation
- Blocked attic ventilation
- Poor grading or drainage
Some causes can be fixed during remediation. Others require a roofer, plumber, insulation contractor, HVAC contractor, waterproofing contractor or general contractor.
The most important question after remediation is:
What has changed so the same area does not become wet again?
If the answer is unclear, pause before rebuilding.
Step 4: Final Cleaning
Final cleaning should happen before the containment comes down or before the room is returned to use.
Depending on the project, this may include:
- HEPA vacuuming
- Damp wiping
- Removal of settled dust
- Cleaning exposed framing
- Cleaning nearby surfaces
- Removing debris
- Bagging and disposal of contaminated materials
- Cleaning access paths
- Checking for remaining visible residue
A room can look clean at a glance but still have fine dust on ledges, joists or horizontal surfaces.
Ask the contractor what areas were included in final cleaning.
This is especially important after drywall removal, attic remediation, crawl-space work or basement demolition.
Step 5: Containment Removal
Containment should not be removed too early.
Plastic barriers, zipper doors and negative-air equipment are there to keep the work area separated while disturbance and cleaning are happening.
Once the contractor confirms that removal, cleaning and drying steps are complete, containment can be taken down.
After containment is removed:
- Do not immediately move dusty belongings back into the area.
- Do not begin sanding, cutting or rebuilding without confirming the area is ready.
- Do not turn equipment off unless the contractor says the drying phase is finished.
- Do not assume the room is ready for normal use if reconstruction is still pending.
If air scrubbers or dehumidifiers remain, ask how long they should run and who will remove them.
Step 6: Post-Remediation Verification or Clearance Testing
Not every project needs post-remediation testing.
For a small, visible mold project where the source is corrected, the area is clean and the work is straightforward, a final inspection may be enough.
Clearance or post-remediation verification may be useful when:
- The project was large
- A sensitive occupant lives in the home
- The mold was hidden
- Documentation is needed
- Insurance is involved
- The property is being sold
- A landlord, tenant or condo board needs records
- There was disagreement over the extent of contamination
- The work involved an attic, crawl space or multiple rooms
- You want independent confirmation before reconstruction
Verification may include:
- Visual inspection
- Moisture readings
- Surface sampling
- Air sampling
- Dust assessment
- Review of the completed scope
The basic goal is simple:
Confirm that the work area is clean, dry and ready for the next phase.
Step 7: Documentation You Should Keep
After remediation, keep the project records.
These documents may help with insurance, resale, landlord-tenant communication, condo management, future repairs or warranty questions.
Useful records include:
- Initial inspection notes
- Photos before remediation
- Photos during remediation
- Photos after remediation
- Moisture readings
- Scope of work
- Invoice
- Disposal details where applicable
- Clearance report if completed
- Lab results if testing was done
- Recommendations for repairs
- Notes about moisture-source correction
- Reconstruction estimates
If the project involved a hidden wall cavity, attic, basement, roof leak or plumbing failure, photos are especially useful.
They show what was removed before the area was closed again.
UMC’s project gallery is helpful for showing what real remediation work can look like before rebuilding. It also helps homeowners understand why the room may look more opened-up after remediation than it did before the work started.
Step 8: When Can Rebuilding Start?
Rebuilding should begin only after the area is ready.
That usually means:
- The moisture source has been repaired
- Remaining materials are dry
- Mold-contaminated porous materials have been removed
- Salvageable surfaces have been cleaned
- Final inspection is complete
- Clearance testing is complete, if required
- The contractor confirms the area can be closed
Rebuilding too soon can hide remaining moisture or contamination.
This is most risky when replacing:
- Drywall
- Insulation
- Flooring
- Baseboards
- Cabinets
- Ceiling materials
- Vapour barriers
- Wall finishes
A clean-looking surface is not enough.
The wall, ceiling or floor assembly should be dry and ready.
Step 9: What Reconstruction May Include
Mold remediation and reconstruction are often separate phases.
After remediation, the area may need:
- New insulation
- New drywall
- Drywall taping
- Priming
- Painting
- Flooring replacement
- Trim replacement
- Cabinet repair
- Ceiling repair
- Attic insulation replacement
- Vapour barrier correction
- Air sealing
- Ventilation upgrades
- Plumbing, roof or drainage repair
In some projects, UMC may complete selected restoration work within the agreed scope. In other projects, a separate contractor may handle reconstruction.
Confirm the responsibility in writing.
Do not assume that “mold remediation” automatically includes full cosmetic restoration unless it is listed in the estimate.
Step 10: What If the Area Still Smells Musty?
A musty smell after remediation should be taken seriously.
It may come from:
- Damp materials that are not fully dry
- Contents that were not cleaned or removed
- Mold outside the original work area
- A remaining moisture source
- Dirty HVAC filters or ductwork
- Wet insulation
- Basement seepage
- Stored cardboard or fabric
- Poor ventilation
- Old odour trapped in porous materials
A mild construction smell or cleaning-product smell may fade.
A damp, earthy, basement-like smell should be investigated.
Do not cover it with air fresheners.
Ask the Toronto mold contractor whether the odour is expected, whether moisture readings were taken, and whether another area may need inspection.
How to Monitor the Area After Mold Remediation
The first few weeks after remediation are important.
The affected area may look clean, but the home still needs to prove that the moisture problem has been solved.
Check the area regularly for:
- New staining
- Damp smells
- Condensation
- Soft drywall
- Wet flooring
- Peeling paint
- Swollen trim
- Moisture around windows
- New spots on wood, drywall or concrete
- Humidity that keeps rising
- Water after rain or snowmelt
- A dehumidifier that runs constantly
Use your nose too.
A musty odour can return before visible mold appears.
Do not ignore a smell because the room was recently remediated. It may point to an unresolved leak, damp contents, wet insulation or a nearby area that was not part of the original scope.
How Long Should You Monitor After Remediation?
There is no fixed timeline, but a practical approach is to monitor more closely during the first 30 to 60 days.
After that, keep checking the area during high-risk conditions, such as:
- Heavy rain
- Snowmelt
- Heat waves
- Humid summer weather
- Freeze-thaw cycles
- After plumbing repairs
- After roof repairs
- After new insulation is installed
- When a basement dehumidifier runs more often than usual
Toronto homes often show recurring moisture problems seasonally.
A basement may look fine in January but become damp in June.
An attic may look dry in summer but develop frost or condensation during winter.
A window area may only show moisture during spring rain or when indoor humidity rises.
The goal is not to worry every day. The goal is to understand the pattern.
Track Indoor Humidity
Health Canada recommends keeping indoor relative humidity between 30 and 50 percent. A simple hygrometer can help you track whether the remediated area stays within a healthier range.
Place a hygrometer in or near the affected space.
Good locations include:
- Finished basement rooms
- Cold rooms
- Laundry rooms
- Bathrooms
- Closets on exterior walls
- Rooms with prior window condensation
- Areas below a roof leak
- Near the rebuilt section after remediation
Do not rely only on how the room feels.
A basement may feel cool while still carrying enough moisture to support mold on stored contents or hidden surfaces.
Watch for the Original Moisture Trigger
After remediation, the most important question is still:
What caused the mold?
If the original trigger comes back, the mold can return too.
Track the conditions linked to the first problem.
For example:
- If the mold followed a roof leak, inspect after storms.
- If it followed a plumbing leak, check the repaired area and nearby materials.
- If it came from condensation, monitor humidity and surface moisture.
- If it came from basement seepage, check after rain and snowmelt.
- If it came from a window leak, watch the sill, trim and drywall below it.
- If it came from poor ventilation, check odours and condensation after showers, cooking or laundry.
EPA guidance is clear that water problems should be fixed and materials dried completely. Porous materials that cannot be cleaned and dried may need to be discarded.
That is the rule after remediation too.
If water comes back, the project is not fully protected.
What to Do With Belongings After Remediation
Contents are often overlooked.
A remediated room can be clean, but belongings that sat in the moldy or damp area may still carry odour, dust or contamination.
Before moving items back, review:
- Cardboard boxes
- Books
- Paper files
- Clothing
- Bedding
- Rugs
- Upholstered furniture
- Wooden shelving
- Stored toys
- Seasonal decorations
- Electronics
- Suitcases
- Fabric storage bins
Hard, non-porous items are often easier to clean.
Porous items are harder.
Moldy cardboard, damp paper, heavily musty fabric and items with visible growth may not be worth saving. Health Canada recommends discarding porous or absorbent materials that are moldy, such as cardboard, paper and ceiling tiles, when they cannot be properly cleaned.
Do not move musty belongings back into a clean area just because the remediation work is finished.
That can reintroduce odour and dust.
Should You Change the HVAC Filter?
Often, yes.
If remediation took place near air returns, supply vents or dusty work areas, ask whether the HVAC filter should be replaced after final cleaning.
A fresh filter may be helpful when:
- The HVAC system ran before the mold was discovered
- The project involved demolition
- The affected area was near a return vent
- Dust entered occupied areas before containment
- The home has occupants with asthma or allergies
- Equipment was running during drying or reconstruction
Do not assume a filter change solves HVAC contamination.
If mold may have affected ducts, fan coils or air-handling equipment, a separate HVAC inspection may be needed.
When Can Furniture and Storage Return?
Bring items back only after the space is clean, dry and ready.
Before returning storage:
- Remove cardboard where possible
- Use washable plastic bins
- Leave air space between items and exterior walls
- Keep items off basement floors
- Avoid packing closets too tightly
- Do not block vents or baseboards
- Keep shelving away from damp walls
- Avoid storing fabrics in cold or humid areas
- Inspect items for odour before returning them
This is especially important in basements, cold rooms, closets, crawl spaces and garages.
Many mold problems return because the original moisture source was corrected, but the same storage habits recreated poor airflow and trapped humidity.
Can Mold Come Back After Remediation?
Yes, mold can return if moisture returns.
Professional remediation removes existing contamination. It does not make a home permanently mold-proof.
Mold may return when:
- The leak was not repaired
- The area was rebuilt while damp
- Insulation was replaced too soon
- Humidity remains high
- Condensation continues
- Ventilation is poor
- Exterior drainage still sends water toward the foundation
- Stored contents hold moisture
- A second hidden source was missed
- New water damage occurs
This does not mean the remediation failed automatically.
It means the environment became favourable again.
A good remediation company should explain the cause and prevention steps, not just remove what is visible.
When to Call Back After Mold Remediation
Contact the mold remediation company if you notice:
- The same musty smell returning
- New visible growth
- Water stains near the repaired area
- Condensation in the same location
- Damp drywall or flooring
- A dehumidifier running constantly
- Paint bubbling after repairs
- Mold on nearby contents
- Moisture readings that remain high
- A new leak or roof problem
- Odour after reconstruction
Do not wait months if the issue appears quickly after the project.
Early follow-up may prevent a small moisture issue from becoming another demolition project.
Insurance and Documentation After Remediation
Keep your records organized.
This matters for:
- Insurance claims
- Future claims
- Real estate disclosure
- Warranty questions
- Condo communication
- Rental-property records
- Contractor accountability
- Future renovations
Save digital copies of:
- Inspection reports
- Photos
- Videos
- Estimates
- Invoices
- Testing reports
- Clearance reports
- Moisture readings
- Repair records
- Roof, plumbing or waterproofing invoices
- Email communication
- Before-and-after images
If the remediation followed a sudden event, such as a burst pipe or roof leak, your insurer may want proof that the damage was addressed promptly.
If the remediation involved a condo unit, keep documents for property management and your insurer.
If the remediation involved a rental unit, both landlord and tenant should keep written records of the issue, access, repair timeline and completed work. Ontario’s Landlord and Tenant Board explains that landlords and tenants each have repair and maintenance obligations under the Residential Tenancies Act.
Condo Considerations After Mold Remediation
Toronto condo projects can involve more than the unit owner.
Mold and water damage may affect:
- The unit interior
- Common elements
- Standard unit components
- Non-standard upgrades
- Shared walls
- Fan-coil systems
- Plumbing stacks
- Neighbouring units
- Insurance deductibles
The Condominium Authority of Ontario notes that condo corporations are generally responsible for common elements and standard unit elements, while owners are typically responsible for decorative and non-standard unit elements. The exact responsibility depends on the governing documents and the Condominium Act.
After remediation, condo owners should confirm:
- Whether property management needs a completion report
- Whether neighbouring units require inspection
- Whether the leak source was a common element
- Whether the corporation or owner handles rebuild
- Whether the unit’s fan-coil or ventilation system needs review
- Whether insurance deductibles apply
- Whether future access is needed for monitoring
This is especially important after bathroom leaks, window leaks, riser leaks, fan-coil leaks and ceiling damage from an upper unit.
Rental Property Considerations After Mold Remediation
For rental properties, aftercare should be clear and documented.
Landlords should confirm:
- The moisture source was repaired
- Remediation was completed
- The affected area is ready for normal use
- Reconstruction responsibilities are clear
- The tenant knows what signs to report
- The records are saved
Tenants should report:
- Recurring odour
- New water stains
- Dampness
- Mold returning
- Leaks
- Condensation
- Damaged repairs
A rental unit can look repaired but still have a moisture problem if the source was not corrected.
Written communication helps prevent confusion later.
Aftercare Checklist
Use this checklist once remediation is complete.
Before rebuilding
- Confirm the source of moisture was fixed
- Confirm the area is dry
- Review photos of opened cavities
- Ask whether insulation can be replaced
- Ask whether clearance testing is recommended
- Confirm what contractor handles reconstruction
- Do not close walls or ceilings too soon
Before moving belongings back
- Inspect contents for odour or visible mold
- Discard moldy cardboard and paper
- Clean hard surfaces
- Replace damaged storage bins
- Keep items away from exterior walls
- Leave airflow around stored contents
- Avoid returning damp fabrics
During the first 30 to 60 days
- Monitor humidity
- Check for odour
- Inspect after rain
- Watch repaired plumbing areas
- Check attic or ceiling areas after storms
- Look for condensation
- Review dehumidifier use
- Save all documents
Long-term prevention
- Maintain indoor humidity between 30 and 50 percent
- Fix leaks quickly
- Keep exhaust fans working
- Improve ventilation where needed
- Keep stored items off basement floors
- Avoid cardboard storage in damp areas
- Inspect roof, plumbing and foundation areas seasonally
- Watch for recurring condensation
How Ultimate Mold Crew Handles Aftercare
Ultimate Mold Crew’s role does not end with removing visible mold.
Depending on the scope, our team may provide:
- Final visual review
- Photos of completed work
- Moisture-related observations
- Recommendations for repairs
- Guidance before reconstruction
- Post-remediation testing options
- Prevention recommendations
- Internal-linkable project documentation where appropriate
For larger jobs, reviewing real project examples can also help homeowners understand why remediation sometimes leaves a room opened, cleaned and ready for rebuilding rather than cosmetically finished on the same day.
See the before-and-after difference and the type of work that may be involved before reconstruction begins.
Frequently Asked Questions
Can I move back into the room right after mold remediation?
Sometimes. If remediation, cleaning and drying are complete, the room may be usable. If reconstruction, drying or clearance testing is still pending, wait until the contractor confirms the area is ready.
Does mold remediation remove the smell?
It should remove odour caused by the remediated mold source. If a musty smell remains, another damp material, hidden area or contaminated content may need attention.
Can I rebuild immediately after mold removal?
Only after the area is clean, dry and approved for repair. Do not install drywall, insulation or flooring over damp materials.
Do I need clearance testing after every mold project?
No. Smaller, straightforward projects may not need testing. Clearance testing is more useful for larger projects, hidden mold, sensitive occupants, insurance, real estate or documentation needs.
What if mold comes back after remediation?
Check whether the original moisture source returned or whether a new moisture source developed. Contact the remediation company if growth, odour or dampness appears near the remediated area.
Should I throw away everything that was in the moldy room?
Not everything. Hard, non-porous items may often be cleaned. Moldy cardboard, paper, ceiling tiles, carpet padding and heavily contaminated porous items may need disposal.
How long should I run a dehumidifier after remediation?
Follow the contractor’s drying plan. Some spaces need temporary dehumidification after water damage. Long-term dehumidifier use may also be needed in damp basements, but it should not replace fixing leaks.
What humidity should I maintain after remediation?
Health Canada recommends keeping indoor relative humidity between 30 and 50 percent. Use a hygrometer rather than guessing.
Should I replace my HVAC filter after mold remediation?
Ask your contractor. It is often a good idea after projects involving dust, demolition or nearby air returns. If the HVAC system itself may be contaminated, a separate inspection may be needed.
Can I paint right after mold remediation?
Only after the area is clean, dry and ready for finishing. Painting over damp materials can trap moisture and hide a returning problem.
What documents should I keep?
Keep inspection notes, photos, invoices, moisture readings, clearance reports, lab results, repair invoices and communication with contractors, insurers, landlords or property management.
Who handles reconstruction after mold remediation?
It depends on the project scope. Some remediation companies provide selected restoration work. In other cases, a general contractor, insulation contractor, drywall contractor or other trade completes reconstruction.
Final Word
After mold remediation, the goal is not only to make the area look better.
The goal is to make sure the affected space is clean, dry, documented and protected from the same moisture problem happening again.
Before rebuilding, confirm that the moisture source is fixed.
Before moving belongings back, make sure they are clean and dry.
Before assuming the problem is gone forever, monitor the area through rain, humidity, cold weather and daily use.
Ultimate Mold Crew provides mold remediation, moisture assessment and aftercare guidance throughout Toronto and the Greater Toronto Area. Call 647-985-2739 if you need help after mold removal, if a musty smell has returned, or if you are unsure whether a remediated area is ready for repair.
