
Updated on 10-Jul-2026
Finding mold in your home can feel stressful because most homeowners do not know what happens next.
Will the walls need to be opened?
Will the family need to leave?
How long will the equipment run?
How do you know the mold is actually gone?
Professional mold remediation is not just spraying a chemical or wiping a dark stain. A proper remediation project identifies the moisture source, isolates the affected area, removes contaminated material safely, cleans remaining surfaces, dries the structure, and verifies that the area is ready for repair.
If you are dealing with visible mold now, Ultimate Mold Crew provides professional mold removal in Toronto for homes, condos, rental properties, basements, attics, and other moisture-damaged areas.
This guide explains what Toronto homeowners should expect before, during, and after professional mold remediation.
Table of Contents
What Happens During Mold Remediation?
Professional mold remediation usually follows this sequence:
- Inspection and moisture investigation
- Scope of work and project planning
- Containment setup
- Occupant and content protection
- Removal of contaminated materials
- HEPA vacuuming and surface cleaning
- Drying and moisture control
- Final inspection or clearance testing
- Reconstruction or repairs
The exact process depends on the size of the affected area, the material involved, the moisture source, and whether mold has entered hidden spaces such as wall cavities, attics, crawl spaces, or HVAC areas.
What Is Professional Mold Remediation?
Professional mold remediation is the controlled process of removing mold contamination and correcting the moisture conditions that allowed it to grow.
A proper remediation project should answer five questions:
- Where is the mold?
- What caused the moisture?
- How far has the moisture travelled?
- Which materials can be cleaned?
- Which materials need removal?
The ANSI/IICRC S520 Standard for Professional Mold Remediation is one of the most recognized industry references for professional mold remediation. The main principle is simple: remediation must control contamination, protect occupants and workers, and correct the moisture problem.
Step 1: Initial Inspection and Moisture Investigation
The first step is not demolition. It is investigation.
Visible mold is often only the surface sign. The moisture source may be behind drywall, under flooring, inside insulation, above a ceiling, or inside a poorly ventilated attic.
During inspection, technicians may check:
- Visible mold growth
- Musty odours
- Water stains
- Damp drywall or trim
- Swollen flooring
- Attic or basement moisture
- Plumbing leaks
- Roof or window leaks
- Condensation
- Relative humidity
- Moisture readings in building materials
Common tools include:
- Moisture meters
- Thermal imaging cameras
- Hygrometers
- Borescopes
- Flashlights and inspection mirrors
- Air or surface sampling equipment when needed
If the mold is visible but the source is unclear, a mold inspection in Toronto can help identify whether the problem is coming from a leak, condensation, poor ventilation, or hidden moisture.
The goal is to find the moisture source and define the true work area. If the moisture problem is not fixed, mold can return after cleanup.
Step 2: Scope of Work and Project Planning
After the inspection, the remediation company should explain the scope of work in clear language.
A good scope should identify:
| Project Area | What Homeowners Should Know |
|---|---|
| Affected rooms | Which areas are included in the work zone |
| Moisture source | What caused or contributed to the mold |
| Materials | What can be cleaned and what may need removal |
| Containment | How clean areas will be protected |
| Equipment | What machines will run during the project |
| Timeline | How long work may take |
| Occupancy | Whether you can stay in the home |
| Verification | How the area will be checked after remediation |
| Repairs | Whether reconstruction is included or separate |
Homeowners often ask about project length at this stage. For a deeper breakdown, see our guide on how long mold removal takes.
This is also the right time to discuss budget. If you need an early estimate, the mold removal cost calculator can help you understand cost factors before the final scope is confirmed.
Step 3: Containment Setup
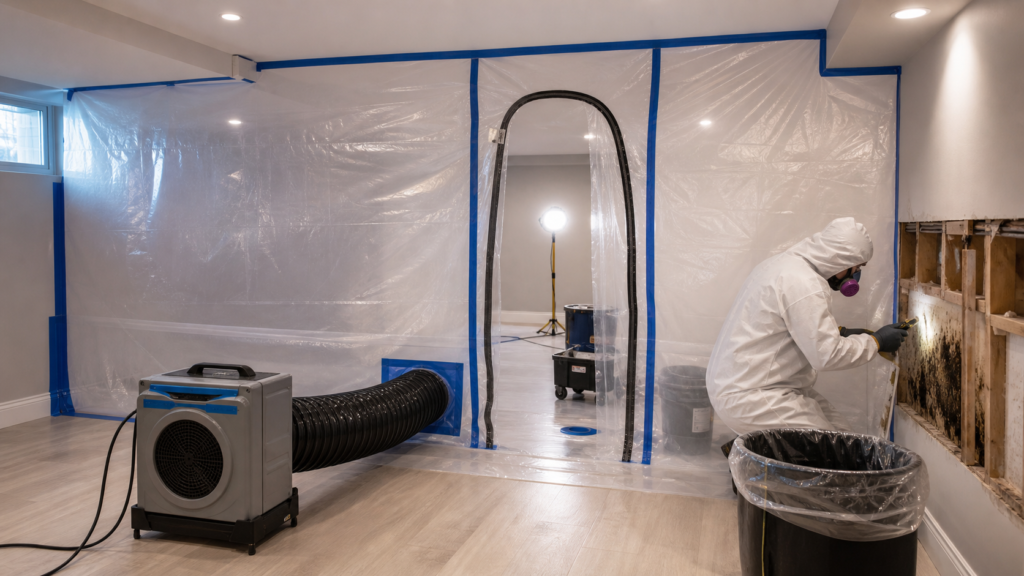
Containment is one of the most important parts of professional mold remediation.
When moldy materials are disturbed, dust and spores can move into nearby clean areas. Containment helps keep the work area isolated.
A containment setup may include:
- Plastic sheeting
- Sealed doorways
- Zipper access doors
- Covered vents
- Floor protection
- Negative air pressure
- HEPA-filtered air scrubbers
For larger projects, technicians may create a controlled work chamber around the affected area. This allows removal and cleaning to happen without spreading dust through the rest of the home.
Step 4: Protecting Occupants and Contents
Before removal begins, the crew protects nearby belongings and clean areas.
This may include:
- Moving furniture away from the work zone
- Covering contents
- Removing stored items
- Protecting flooring
- Closing or sealing HVAC openings
- Setting up a safe access path
Many small projects allow homeowners to stay in unaffected parts of the home. Temporary relocation may be recommended when the project is large, multiple rooms are involved, demolition is heavy, or occupants have asthma, allergies, immune concerns, or other respiratory sensitivities.
If occupants are concerned about airborne mold particles or musty odours, air quality testing in Toronto may be useful before or after remediation, depending on the situation.
Step 5: Removal of Mold-Damaged Materials
Some materials can be cleaned. Others cannot.
Porous materials often hold mold below the surface. If they are heavily contaminated or water-damaged, they usually need removal.
Materials that may need removal include:
- Drywall
- Insulation
- Carpet
- Ceiling tiles
- MDF or particleboard
- Water-damaged trim
- Contaminated cardboard or stored contents
Removal is done inside containment. Contaminated debris is usually bagged or wrapped before it leaves the work area.
This stage can feel disruptive because walls, ceilings, flooring, or cabinets may be opened. That is often necessary when mold is hidden behind finished materials.
Step 6: Cleaning Remaining Structural Materials
After damaged materials are removed, the remaining surfaces are cleaned.
These may include:
- Wood framing
- Subfloors
- Concrete
- Joists
- Roof sheathing
- Masonry
- Metal or plastic surfaces
Common cleaning methods include:
HEPA Vacuuming
HEPA vacuuming removes fine dust, settled spores, and debris from surfaces.
Damp Wiping
Hard surfaces may be cleaned with appropriate cleaning solutions after loose debris is removed.
Mechanical Cleaning
Wood or other semi-porous materials may need brushing, sanding, or other mechanical cleaning when contamination is more embedded.
Spraying alone is not enough. Physical removal of contamination is the key part of remediation.
Step 7: Drying and Moisture Control
Mold remediation is not complete until the affected materials are dry.
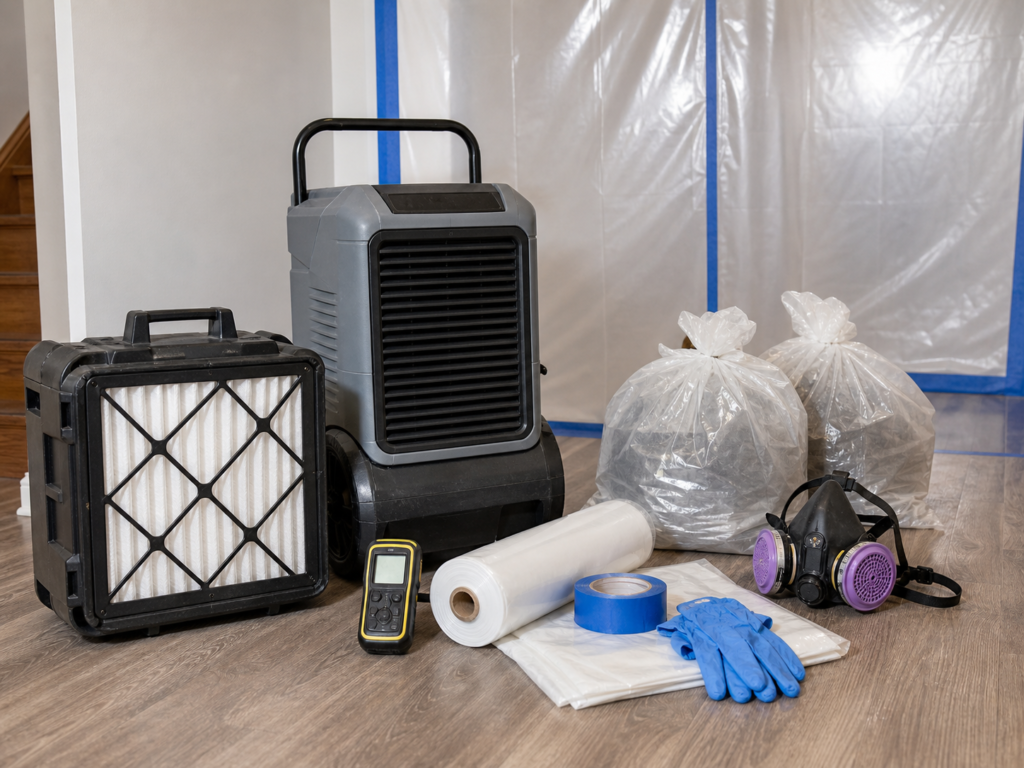
The crew may use:
- Commercial dehumidifiers
- Air movers
- HEPA air scrubbers
- Moisture meters
- Humidity monitoring
Drying time depends on the material and source of water. A small isolated area may dry quickly. A basement, attic, crawl space, or wall cavity can take longer.
If the mold followed flooding, a burst pipe, or a leak, the project may also overlap with water damage restoration in Toronto. Water damage and mold remediation often connect because mold growth starts when wet materials remain damp long enough.
The crew should confirm that moisture levels are acceptable before closing the area or starting reconstruction.
Step 8: Final Inspection and Clearance
At the end of remediation, the area should be inspected before repairs begin.
A final check may include:
- Visual inspection
- Moisture readings
- Dust and debris check
- Odor check
- Confirmation that the moisture source was corrected
- Air or surface testing when appropriate
Independent post-remediation verification may be recommended for larger projects, real estate transactions, insurance claims, sensitive occupants, or situations where documentation is needed.
A successful remediation area should have:
- No visible mold
- No visible dust or debris from remediation
- No active moisture problem
- No musty odour
- Dry affected materials
- A clear path for repairs
Step 9: Reconstruction and Repairs
Remediation and reconstruction are not always the same service.
After mold removal, the home may still need:
- New drywall
- New insulation
- Painting
- Flooring repair
- Trim replacement
- Cabinet replacement
- Attic or basement repair work
Homeowners should confirm whether the remediation company handles reconstruction or whether a separate contractor is needed.
You can review examples of completed work on our mold remediation projects page to better understand what remediation and repair access may look like in real homes.
What Equipment Will You See During Mold Remediation?
Homeowners commonly see:
- HEPA air scrubbers
- Negative air machines
- Dehumidifiers
- Air movers
- Moisture meters
- Thermal imaging cameras
- Containment barriers
- Disposal bags
- PPE
Technicians may wear:
- Disposable coveralls
- Gloves
- Eye protection
- Respirators
This can look serious, but it is normal. Protective equipment helps reduce exposure and keeps the work controlled.
Do You Need to Leave Your Home?
Not always.
You may be able to stay if the mold is isolated, containment is strong, and the work area is separate from living areas.
Temporary relocation may be recommended when:
- Multiple rooms are affected
- Major demolition is required
- The HVAC system may be contaminated
- Sewage or contaminated water is involved
- Occupants have asthma or strong mold sensitivity
- Infants, seniors, or immune-compromised people live in the home
A remediation company should explain the occupancy plan before work starts.
How Long Does Professional Mold Remediation Take?
Most small residential projects take one to three days.
Larger projects may take several days or more than a week, especially when there is heavy water damage, drying time, hidden mold, basement contamination, attic mold, or reconstruction.
Timeline depends on:
- Size of the affected area
- Moisture source
- Material type
- Amount of demolition
- Drying requirements
- Clearance testing
- Repair work
If the mold is in an attic, the process may involve roof sheathing, insulation, ventilation, and access issues. See our attic mold removal Toronto page for attic-specific remediation details.
If the mold is in a crawl space, the project may involve soil moisture, wood framing, vapour barriers, and access limitations. See our crawl space mold removal page for that type of project.
The fastest project is not always the safest project. Drying and verification matter.
Toronto-Specific Mold Remediation Considerations
Toronto homes often have mold issues connected to local building conditions and weather patterns.
Common Toronto and GTA factors include:
- Finished basements
- Older plumbing water leakage
- Poor attic ventilation
- Ice dam leaks
- Basement seepage during spring thaw
- Humid summer conditions
- Condensation in cold rooms
- Older plaster or mixed wall assemblies
- Condo plumbing leaks from neighbouring units
In condos, the process may also involve property management, the condo corporation, neighbouring units, or building maintenance records.
Warning Signs of Poor Mold Remediation
Be cautious if a contractor:
- Offers only to spray chemicals
- Does not inspect the moisture source
- Skips containment
- Does not use HEPA filtration
- Paints over mold
- Promises instant removal without investigation
- Does not explain what materials need removal
- Leaves dust or debris behind
- Does not discuss drying
- Cannot explain final verification
Professional remediation should solve both the contamination and the moisture condition.
How to Prepare Before the Crew Arrives
Before remediation starts:
- Clear access to the work area
- Move valuables away from the affected space
- Take photos for your records
- Ask whether belongings need to be removed
- Confirm whether utilities or HVAC need adjustment
- Ask about noise, equipment, and work hours
- Keep children and pets away from the work zone
- Ask if insurance documentation is needed
Good preparation helps the crew work faster and reduces disruption.
Questions to Ask Before Hiring a Mold Remediation Company
Ask these questions before approving work:
- What caused the mold?
- What areas are included in the scope?
- What materials will be removed?
- What materials can be cleaned?
- How will containment be built?
- Will HEPA filtration be used?
- Will moisture readings be taken?
- Is reconstruction included?
- Do you provide photos or documentation?
- Is clearance testing recommended?
A professional mold removal services company in Toronto GTA should answer clearly without pressure.
How Ultimate Mold Crew Helps Toronto Homeowners
Ultimate Mold Crew helps Toronto and GTA property owners inspect, contain, remove, clean, and document mold problems.
Our team can help with:
- Mold inspection
- Moisture source investigation
- Containment setup
- Mold removal
- HEPA cleaningc
- Attic mold remediation
- Basement mold remediation
- Crawl space mold cleanup
- Air quality testing
- Before and after project documentation
For homeowners, landlords, real estate agents, and property managers, clear documentation can make the process less stressful and easier to understand.
FAQs About Professional Mold Remediation
How long does professional mold remediation take?
Small projects may take one to three days. Larger projects with demolition, drying, hidden mold, or reconstruction can take longer.
Is mold remediation messy?
Some demolition debris is expected, but containment and HEPA filtration are used to control dust and reduce spread.
Can I stay in my house during mold remediation?
Many homeowners can stay in unaffected areas during smaller projects. Larger projects or sensitive occupants may require temporary relocation.
Will mold come back after remediation?
Mold should not return if the contamination is removed and the moisture source is corrected. If the moisture problem remains, mold can return.
Is mold testing always necessary?
No. Visible mold often does not need testing before removal. Testing may help when mold is hidden, documentation is needed, or clearance verification is required.
What happens to moldy drywall?
Moldy or water-damaged drywall is often removed, bagged, and disposed of. New drywall is installed during reconstruction.
Does remediation remove musty odours?
Proper remediation usually removes musty odours when the source of mold and moisture has been corrected.
Should HVAC systems be inspected?
Yes, if mold may have entered ducts, vents, air handlers, or HVAC-connected spaces.
Final Takeaway
Professional mold remediation is a controlled process. It starts with inspection, moves into containment and safe removal, continues through cleaning and drying, and ends with verification and repair.
The best remediation projects do not only remove visible mold. They identify why the mold grew, prevent spread during work, remove contaminated material safely, and confirm that the affected area is dry before the home is rebuilt.
For professional mold remediation in Toronto and the GTA, contact Ultimate Mold Crew to book a mold inspection or free video-call consultation.
Sources
- EPA: Mold Cleanup in Your Home
https://www.epa.gov/mold/mold-cleanup-your-home - EPA: A Brief Guide to Mold, Moisture and Your Home
https://www.epa.gov/mold/brief-guide-mold-moisture-and-your-home - Health Canada: Addressing Moisture and Mould in Your Home
https://www.canada.ca/en/health-canada/services/publications/healthy-living/addressing-moisture-mould-your-home.html - Canadian Centre for Occupational Health and Safety: Indoor Air Quality and Mould
https://www.ccohs.ca/oshanswers/chemicals/iaq/iaq_mould.html - IICRC: ANSI/IICRC S520 Standard for Professional Mold Remediation
https://iicrc.org/s520/
Related posts:
- Mold Containment During Remediation – Requirements & Rules
- ANSI/IICRC S520 Standards For Professional Mold Remediation
- How to Stop Mold from Returning During Cold Months?
- Why Mold Growth Increases in Toronto Homes During Winter?
- Mold After Snow Melt: Causes, Prevention & Removal Toronto
- DIY Mold Testing Kits v/s Professional Mold Inspection – Comparison
